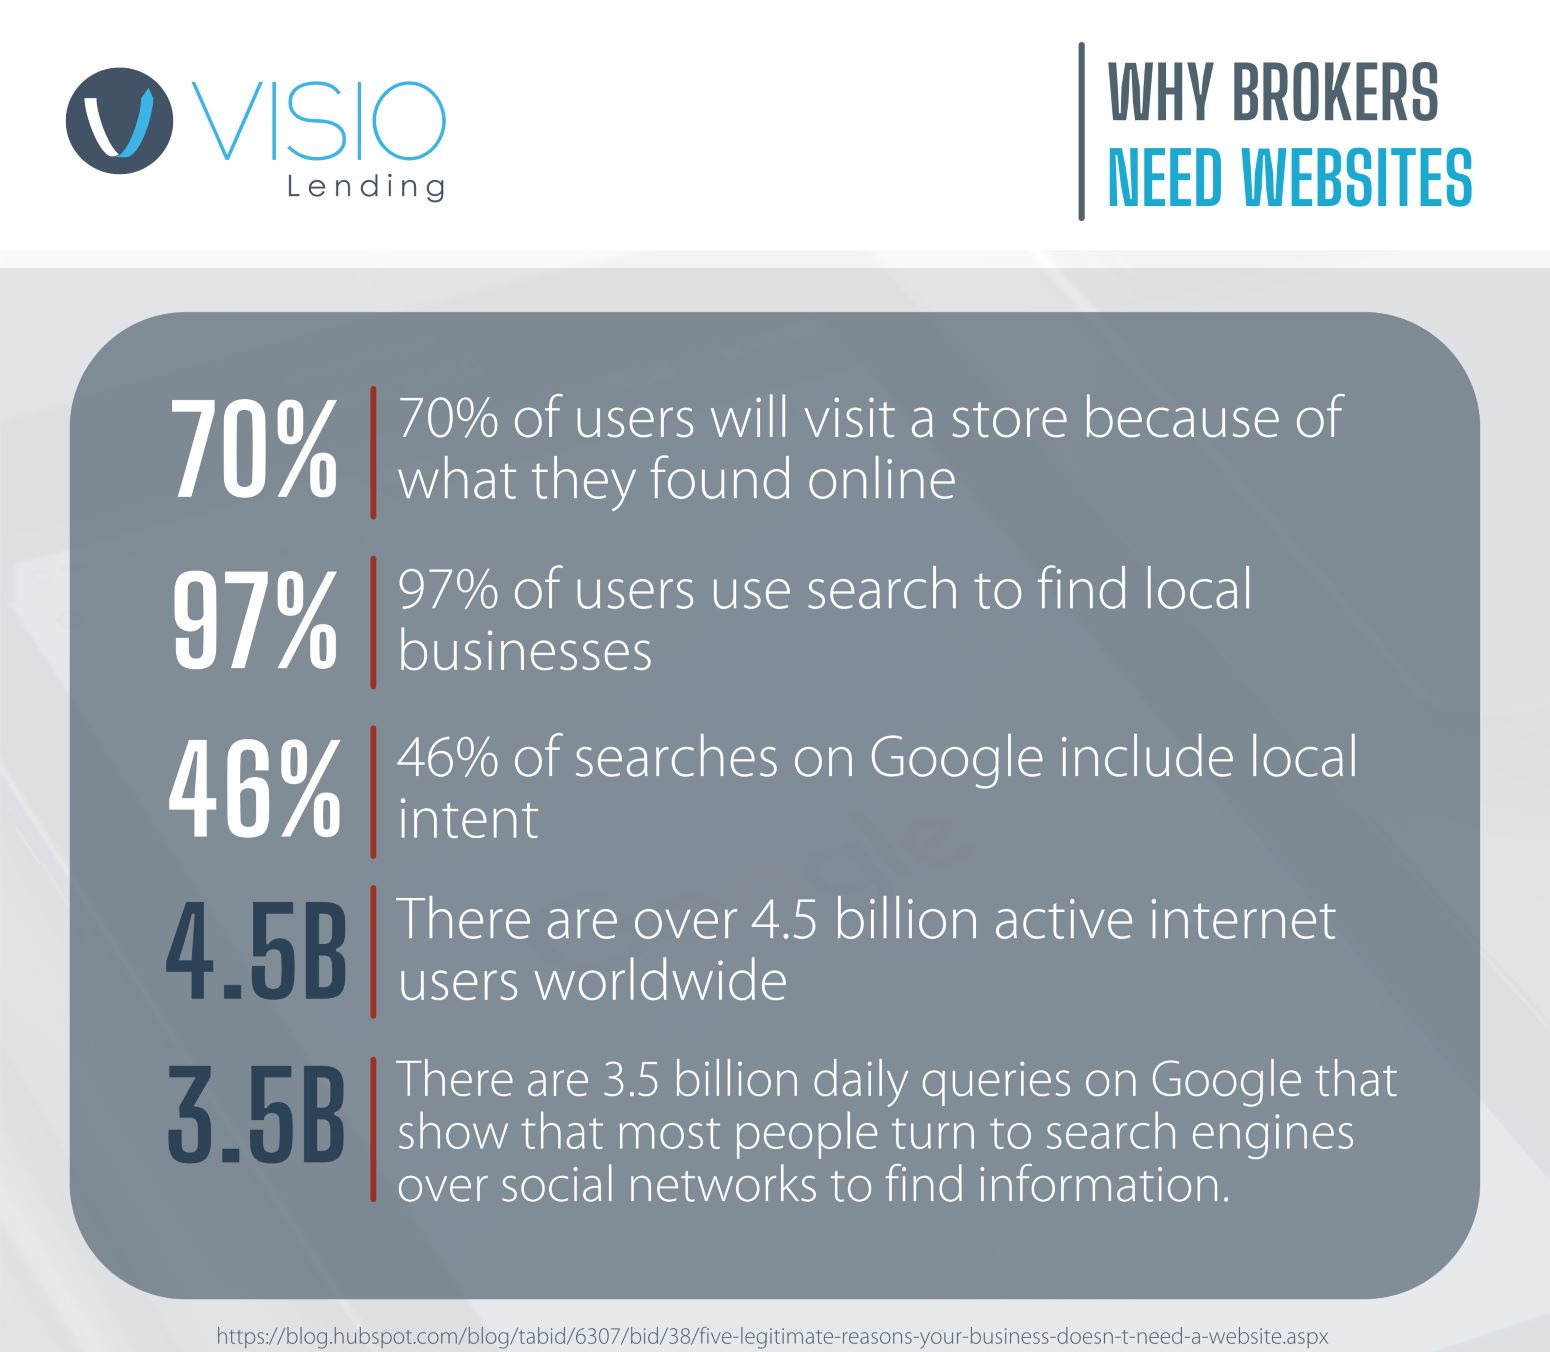
If you are looking to grow your broker business, step one should be revamping your website. When executed properly, a business website provides a way for potential customers to find you on the internet, helps generate leads, establishes mortgage industry authority, and serves as your 24/7 customer service representative. If that doesn’t convince you, here is some pretty compelling data from HubSpot on the powerful uses of a business website.
Websites are also affordable and easy to maintain. In this guide, we’ll take a closer look at what brokers should put on their websites, as well as how they can create one.
Elements of a Successful Broker Website
If you already have a website, congratulations! You’re ahead of the game. Let’s take some time to make sure your website is fully serving your business. We’ll go through all the web pages needed and give you the essentials for each. If you do not have a website, feel free to skip to the next section to learn how to set up a new website.
Home Page
Think of your homepage as your virtual front door. This is the front page to draw visitors into your website, and therefore needs to give an overview of your mortgage broker business and offerings, as well as provide guidance on where else to look.
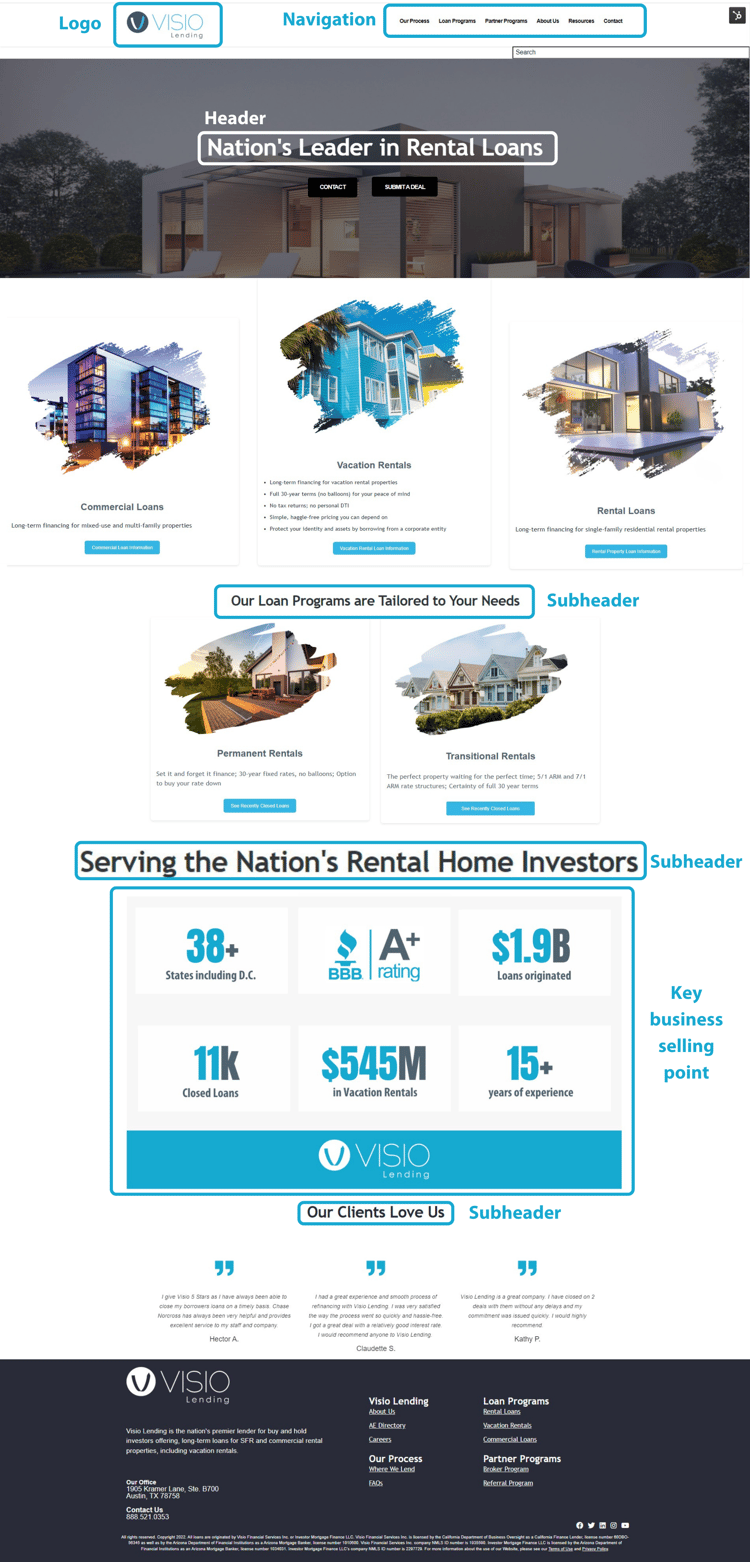
A home page should include:
- Logo: Place your logo in the upper left-hand corner. This will clearly identify your mortgage business. Further, most companies place their logos in the same spot, so your target audience will expect to see it there.
- Navigation: Also at the top of the page should be a navigation menu to your other web pages. Remember, with your first page you are inviting users in and showing them where else to go.
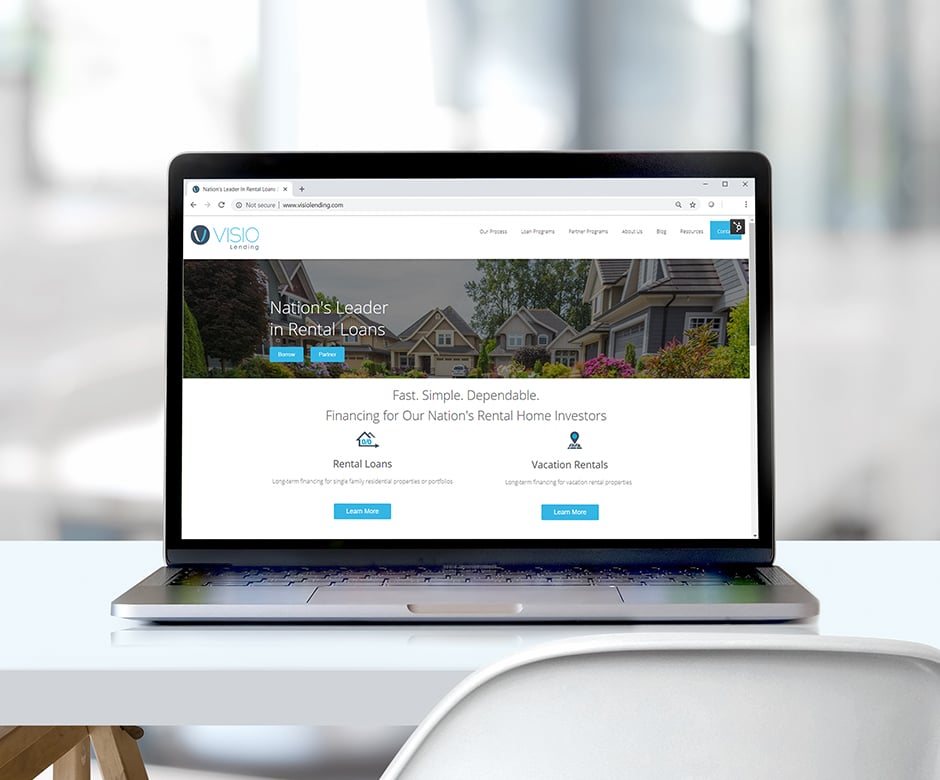
- Header: HubSpot marketing platforms say users should be able to tell what your business does in under three seconds. Make your header short and sweet and really hone in on your message. Our is "Nation's Leader in Rental Loans."
- Key-Business Selling Points: This is essentially your elevator pitch. List out what makes your mortgage business stand out and why new customers will love you.
- Sub-Headers: Now that you have your mortgage broker initiatives summed up in a few keywords, you can break the rest of the information into sections with sub-headers. We have sections featuring our loan programs, our experience, and our testimonials.
About Page
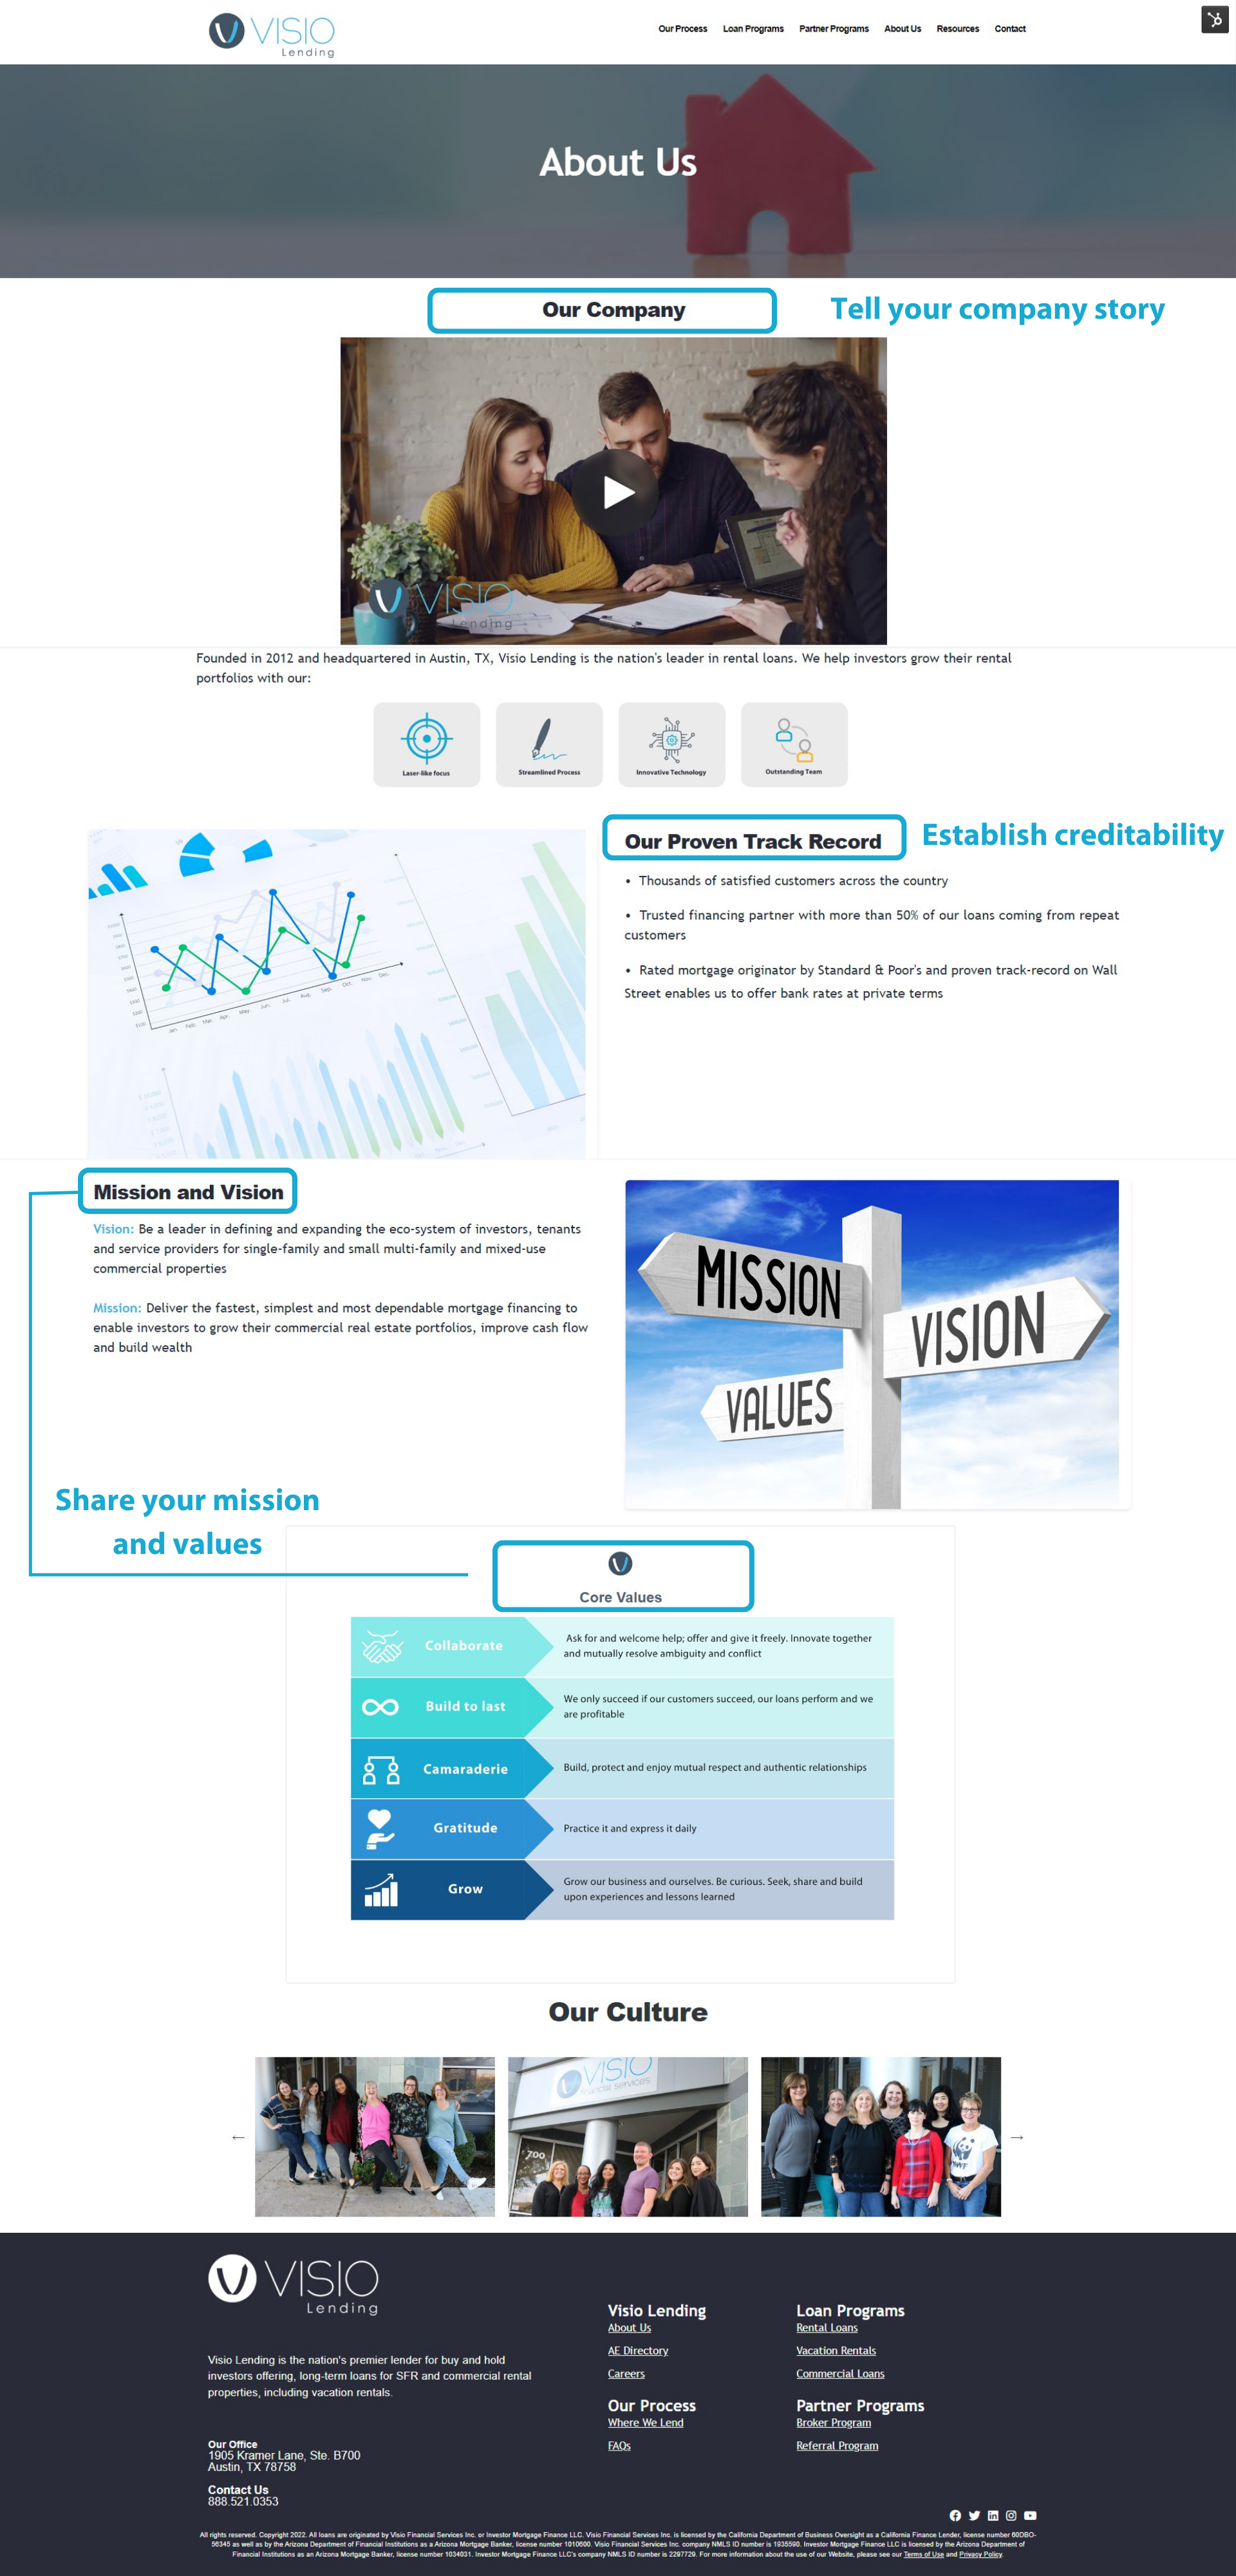
This is where on a mortgage website you tell your story and establish your credibility.
Here are the main points you want to convey on About pages:
- Tell Your Company Story: How long have you been in business? What is your experience? What do you bring to the table? What makes you the best mortgage firm?
- Establish Credibility: What do your clients say about you? Are you accredited with any trusted organizations, such as the National Association of Mortgage Brokers? Have you won any awards?
- Share Your Mission and Values: Mortgage broker websites make it hard to connect on a personal level, but sharing your mission statement and the values you hold as a mortgage broker can help.
Contact Page
This is where you capture leads.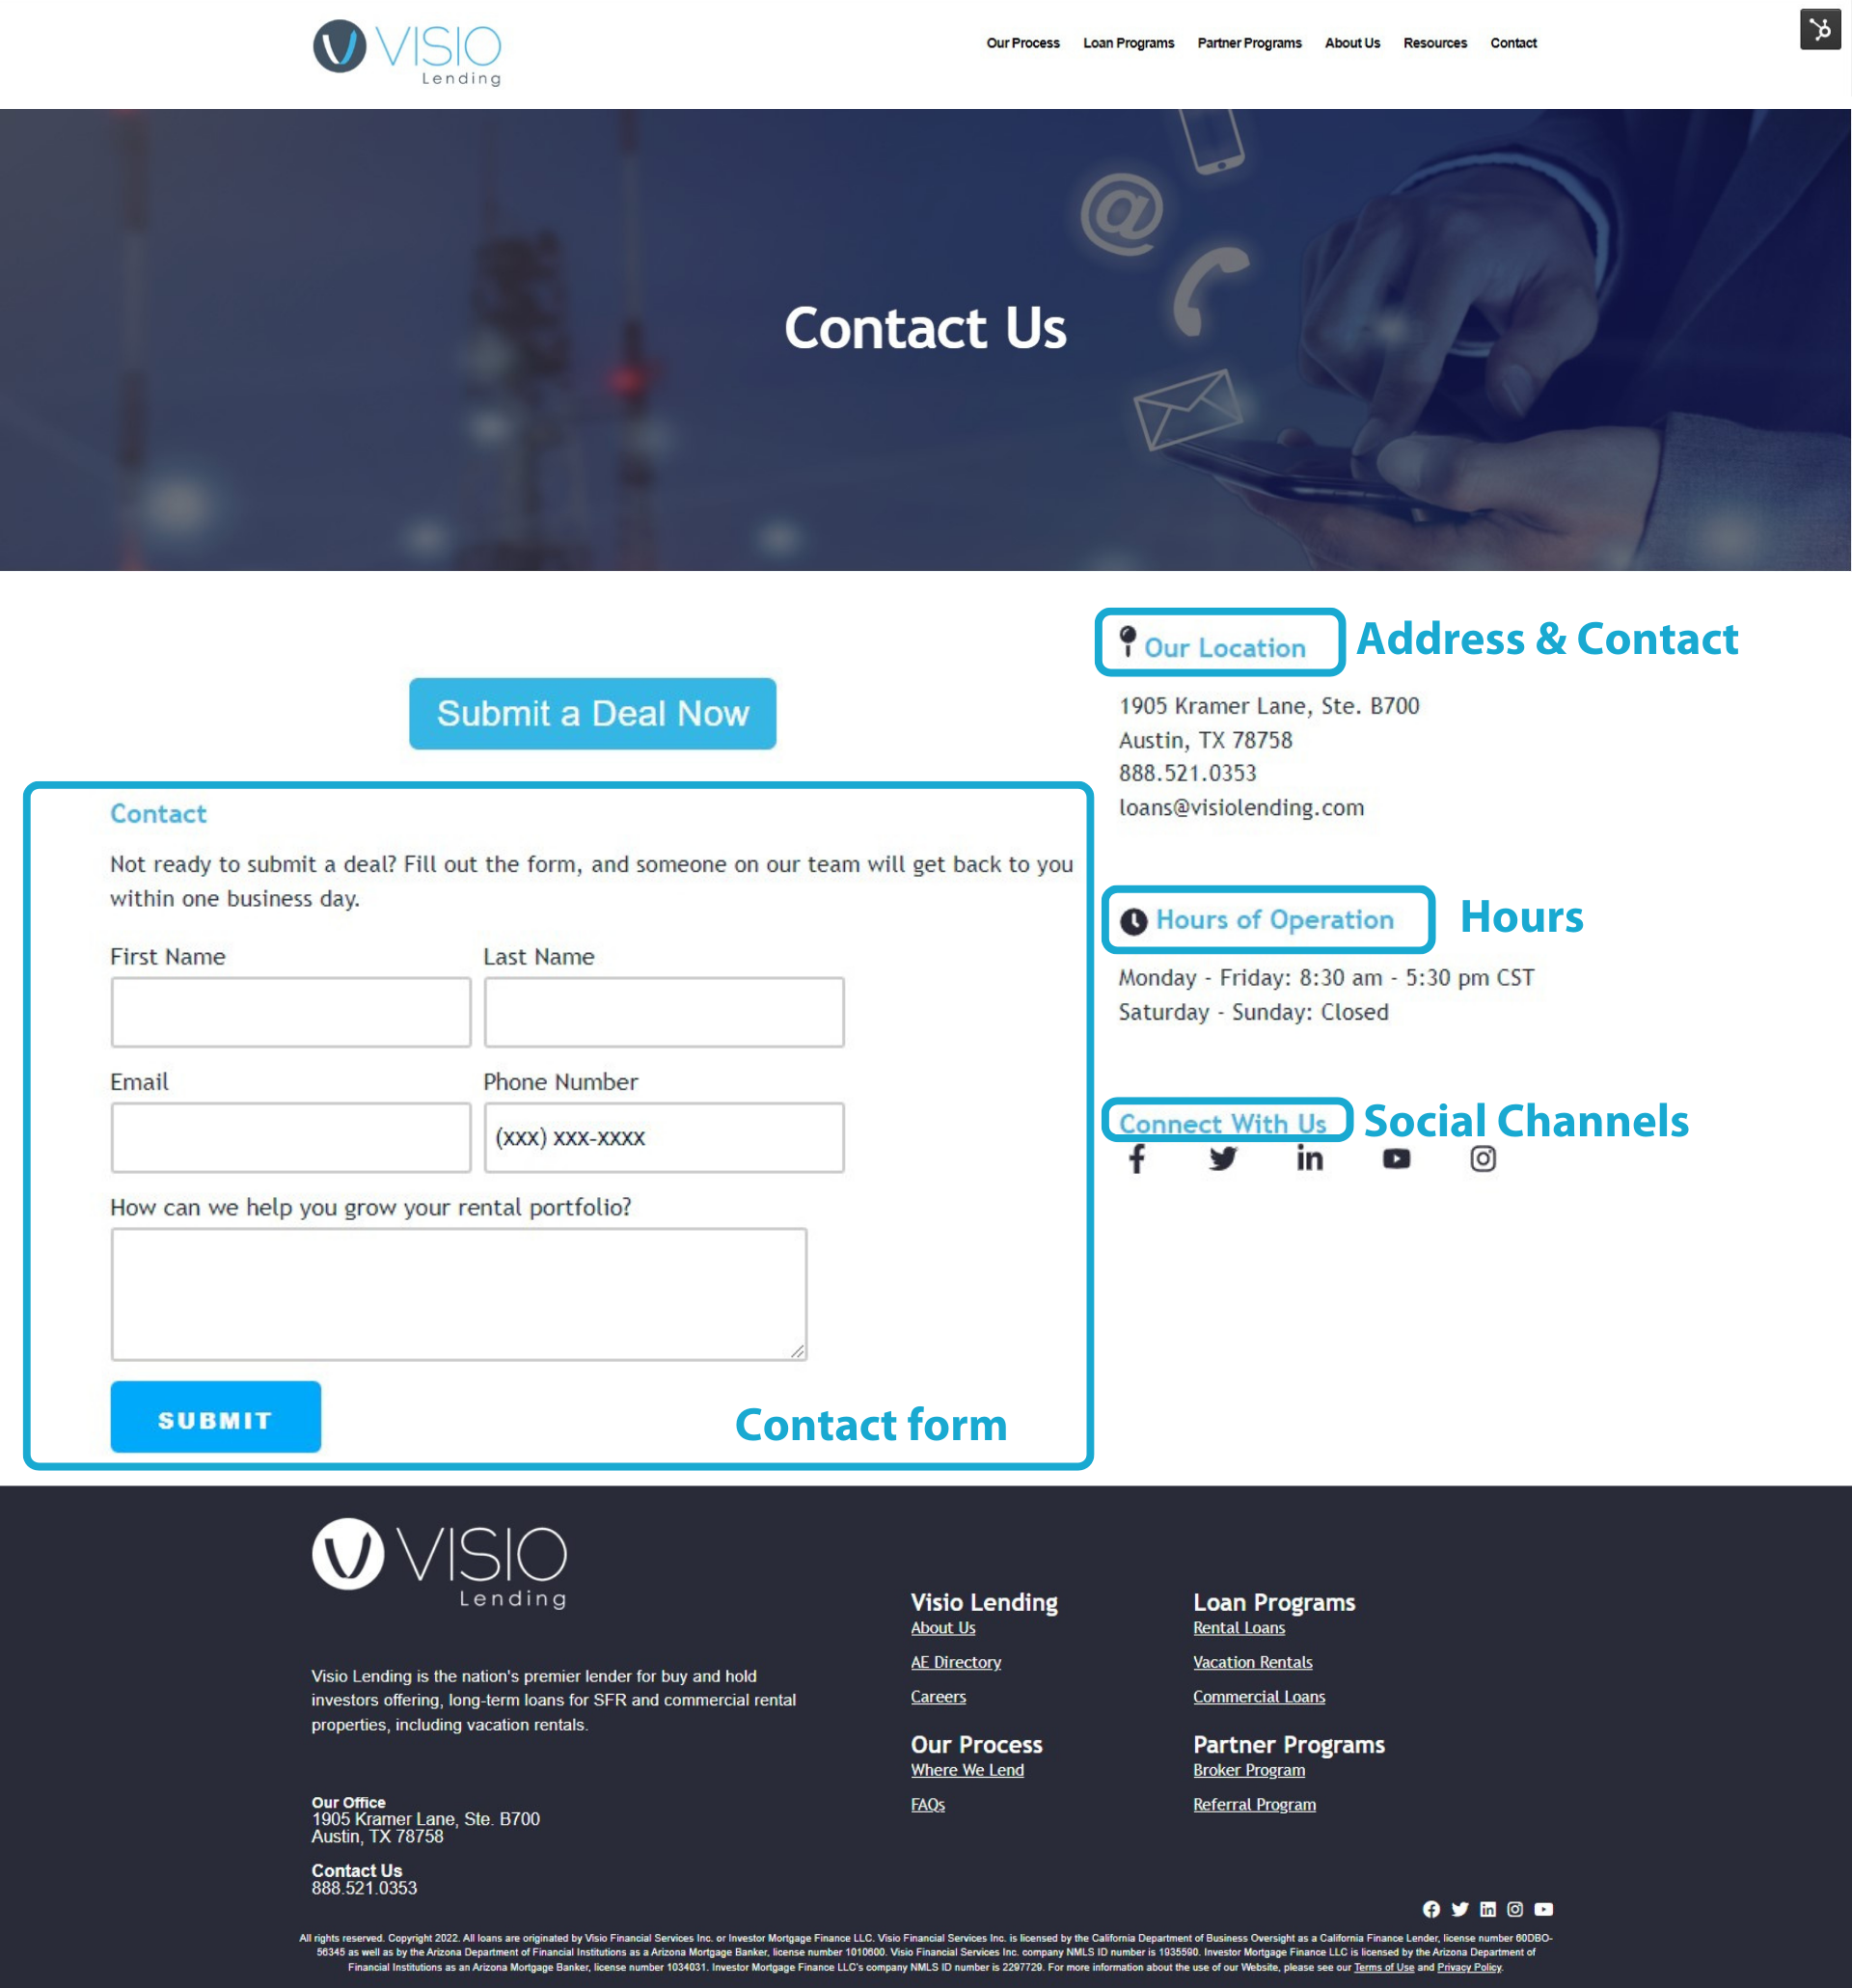
Here is what you need to put on your contact section to give your audience ample opportunities to reach you:
- Contact Form: A contact form allows more customers to share their contact information with you.
- Address: Even if clients do not visit you in the office, putting an address adds credibility.
- Contact Information: Include an email address and phone number where people can reach you. People especially appreciate a phone number if they want to reach you immediately.
- Social Channels: If you have a social media presence, link your channels
Product & Services Page
This is the page that shares the product and services you have to offer.
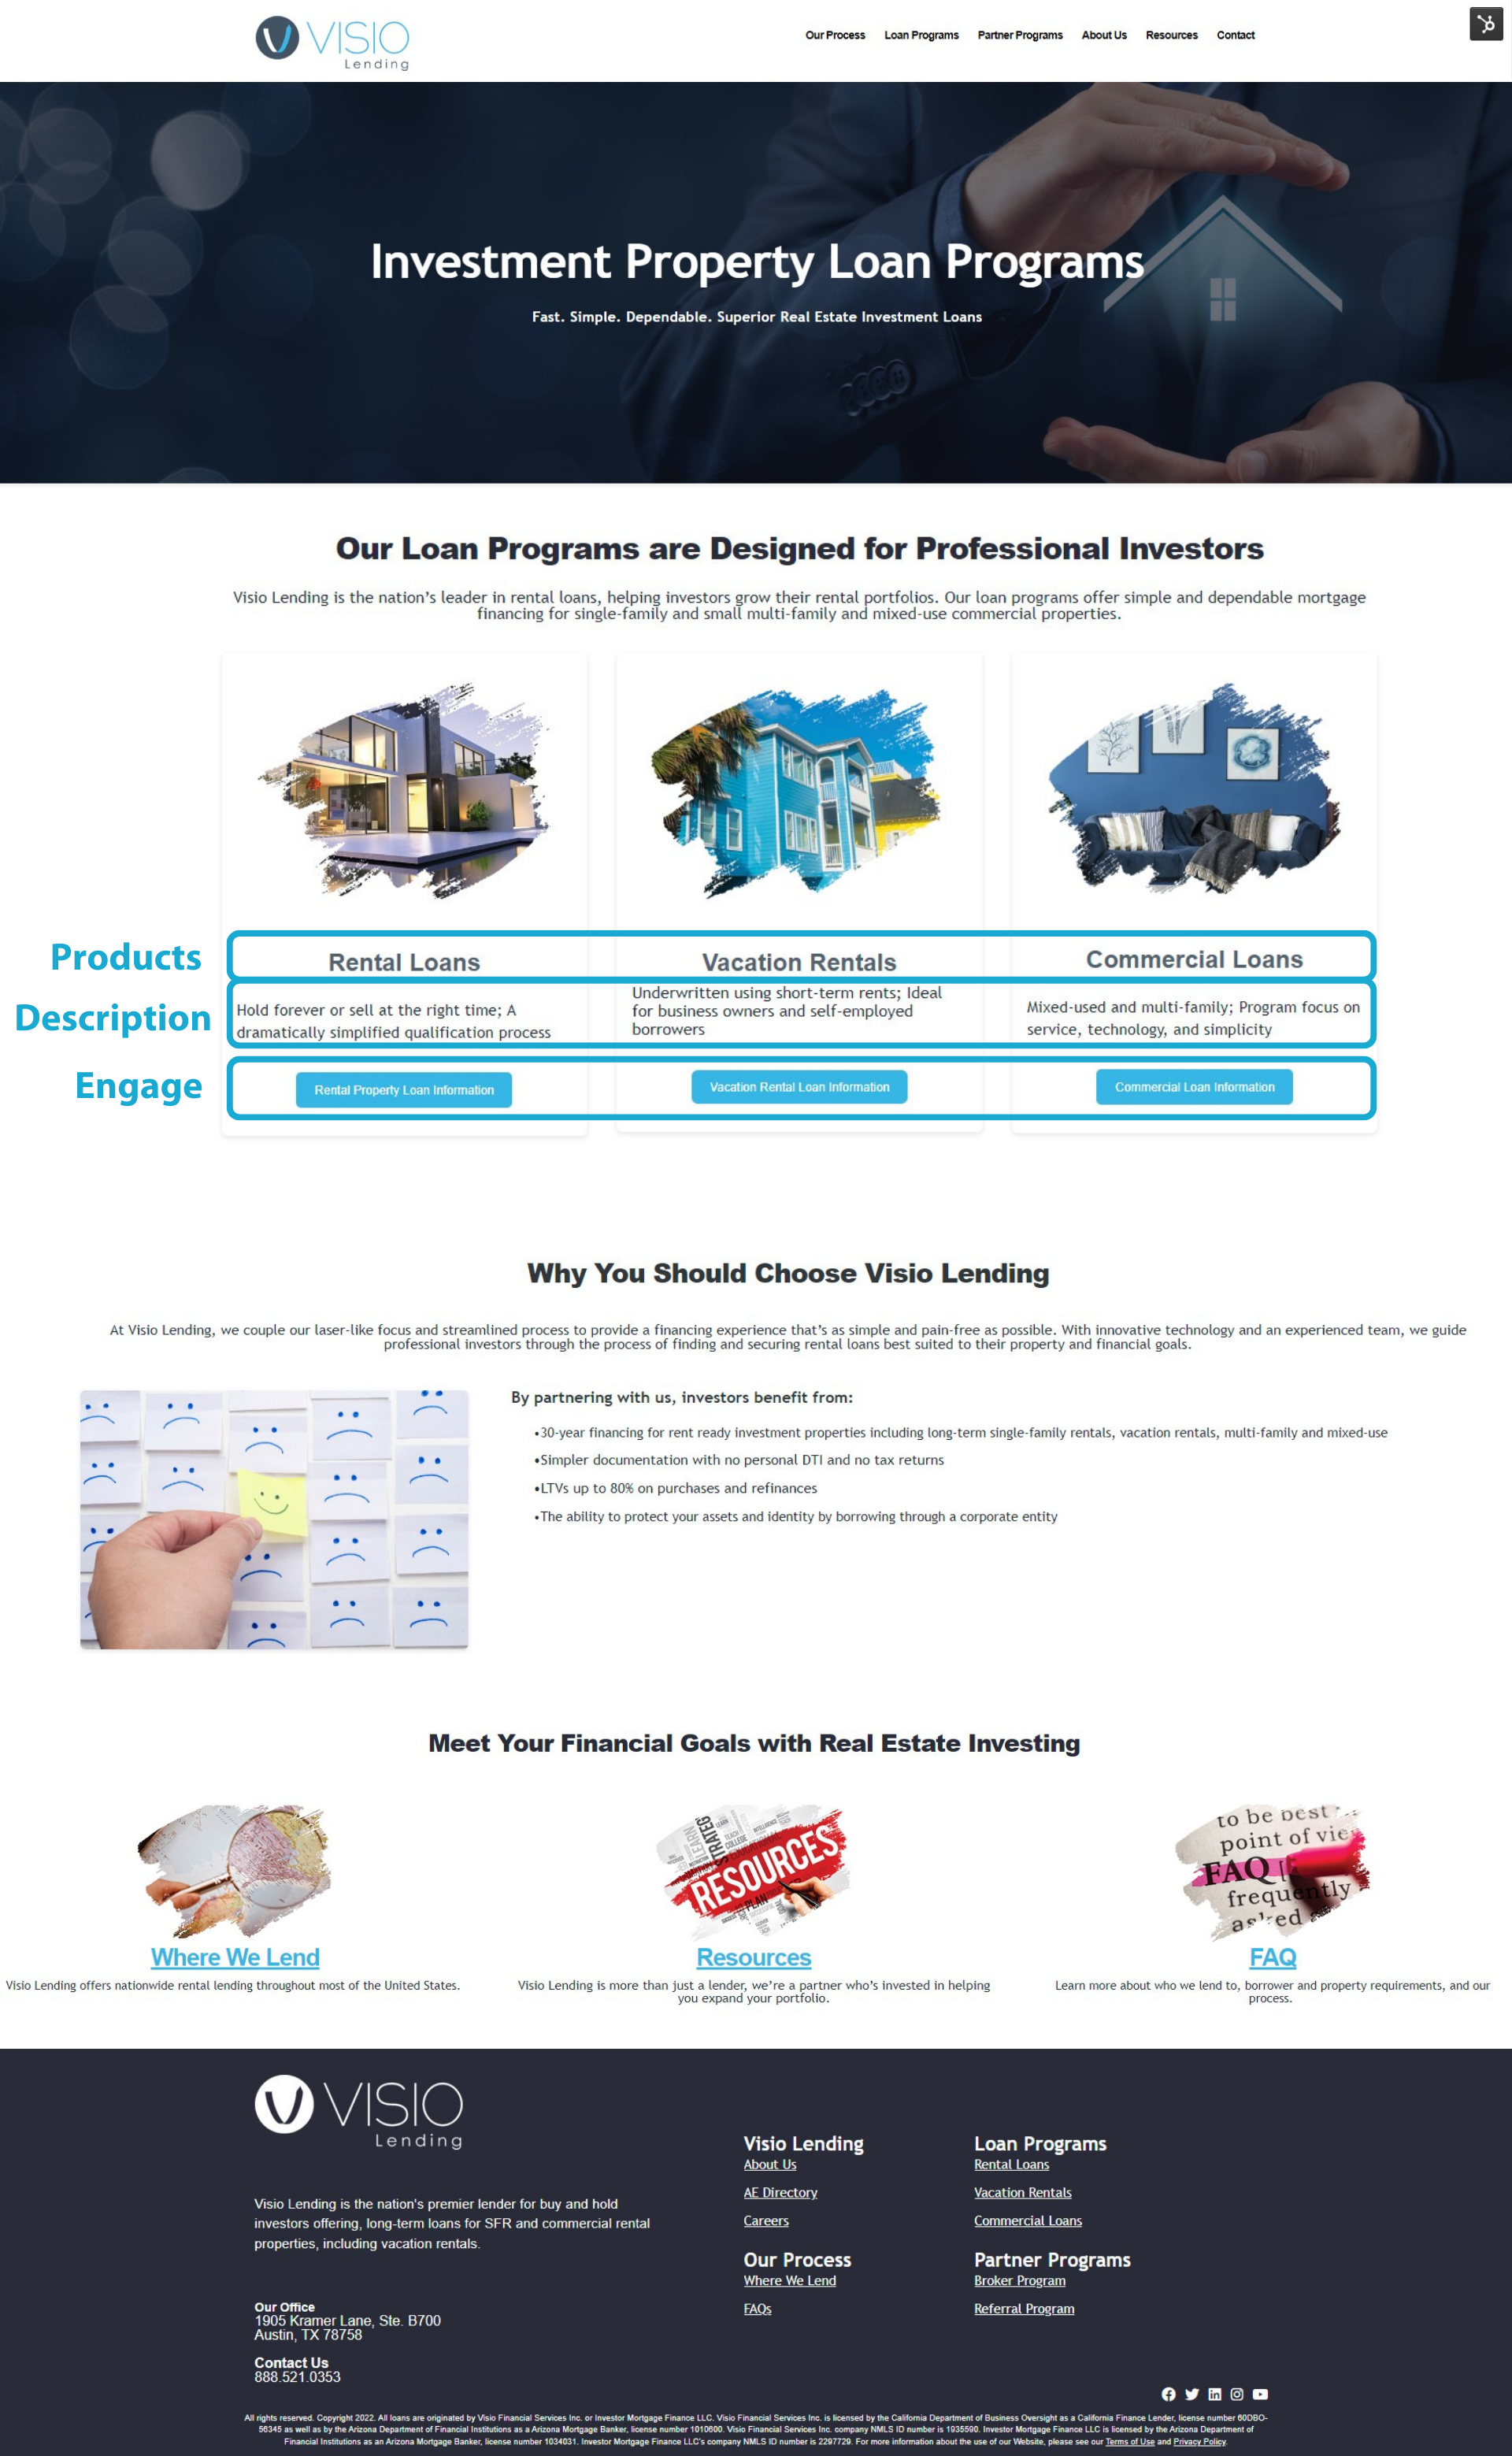
Here is what you should aim to put on this page:
- List of your products or services: Simply put what it is you bring to the table and provide your clients.
- Description of your products and services: Add a brief description to each so they are clear.
- Ways to engage: Include a way to learn more or to contact you to learn more about your products and services.
FAQs
Answer the frequently asked questions you get as a mortgage broker.
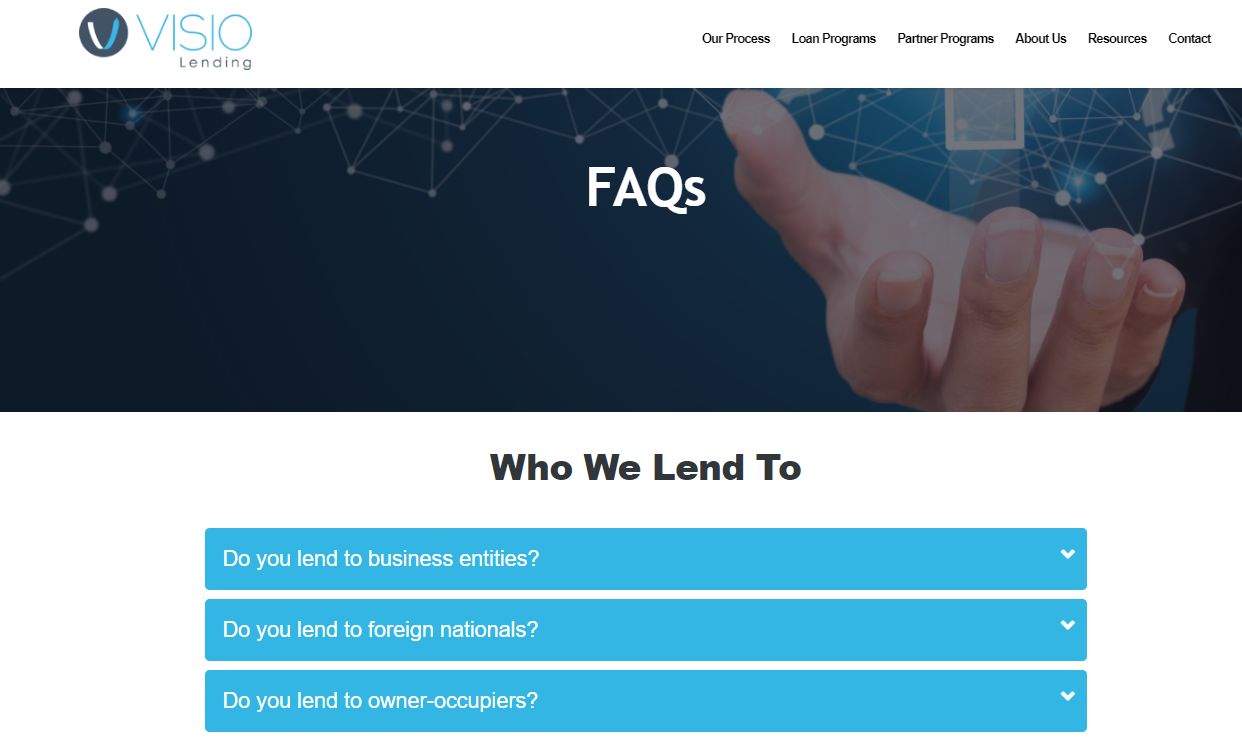
Some ideas of questions to ask include:
- Questions about mortgage brokers
- What is a mortgage broker?
- Why should I use a mortgage broker?
- How do mortgage brokers get paid?
- Does a mortgage broker save me time?
- What qualities and credentials should I look for in a mortgage broker?
- Questions about the loan process and rates
- What will my rate be?
- What is the difference between fixed rates and adjustable rates?
- What is a rate lock?
- What are closing costs?
- What do I need to complete a loan application?
Blog
Use a blog to boost your search engine optimization and to establish industry authority.
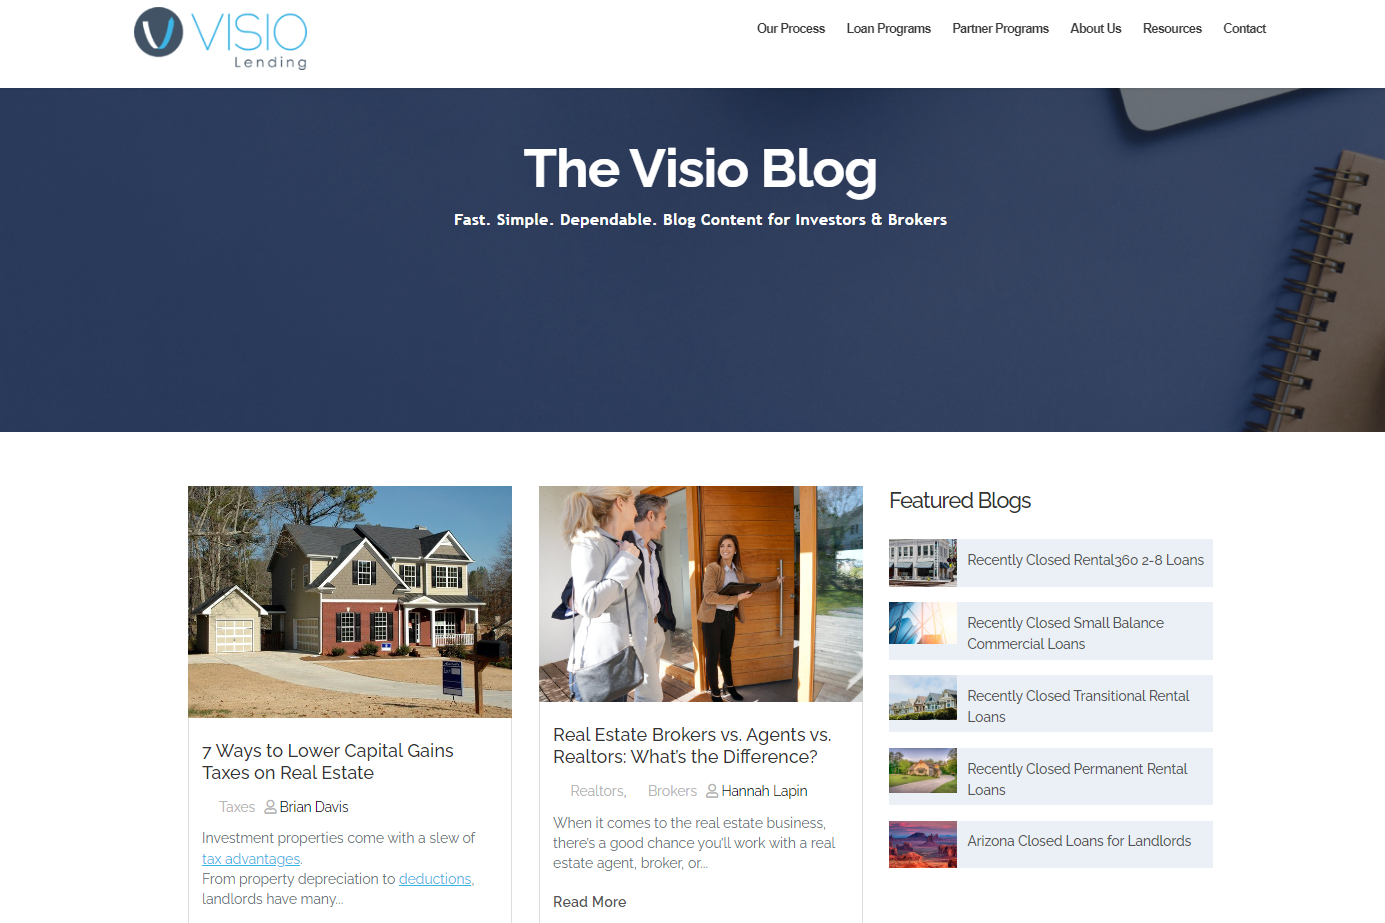
Starting a blog is a big undertaking, but we have a full guide to walk you through the process.
Creating Your Broker Website
For those of you without an existing broker website, we are going to walk you through setting up a new website on the user-friendly platform, Wix. We really like Wix for mortgage broker websites because of its affordability and ease of use. Wix offers step-by-step guidance and an interactive website-building tool. You can also use their artificial intelligence tools for a seamless website design. Here's how to get started with your brand new Wix website.
1. Create your account & answer key questions about your website & experience
Visit Wix, and click "Start Now."

First, fill out your email address and create a password. Next, Wix will ask you to share some things about your business and broker website needs. We encourage you to take your time with these, because Wix will provide targeted guidance based on your answers.

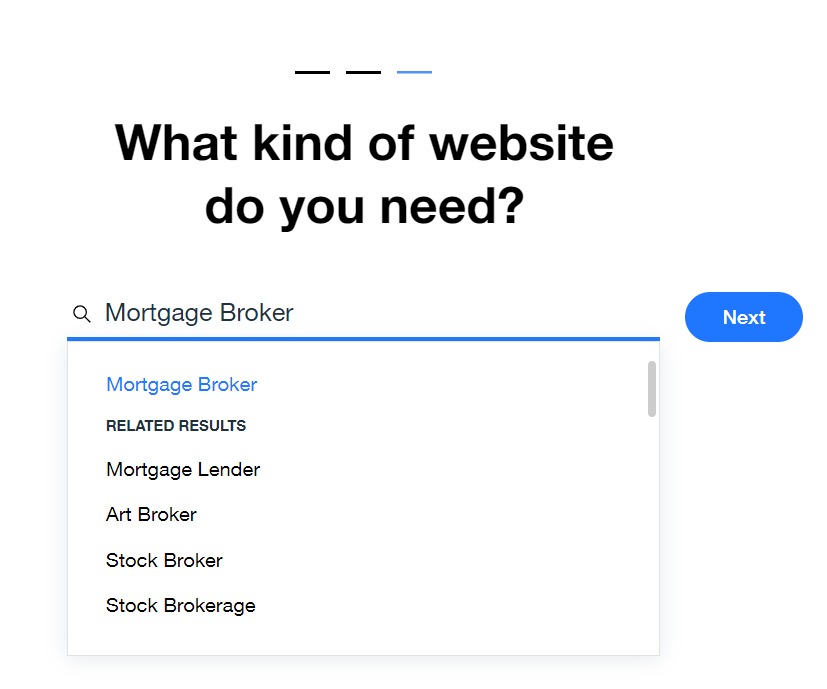
Wix will ask you about the purpose of your website, your past experience creating websites, and what kind of website you will need. When you get to the part about the kind of website, use the search feature. It might surprise you how specific it will become, and will suggest purposes as detailed as "mortgage broker," "real estate agent," or "loan officer."
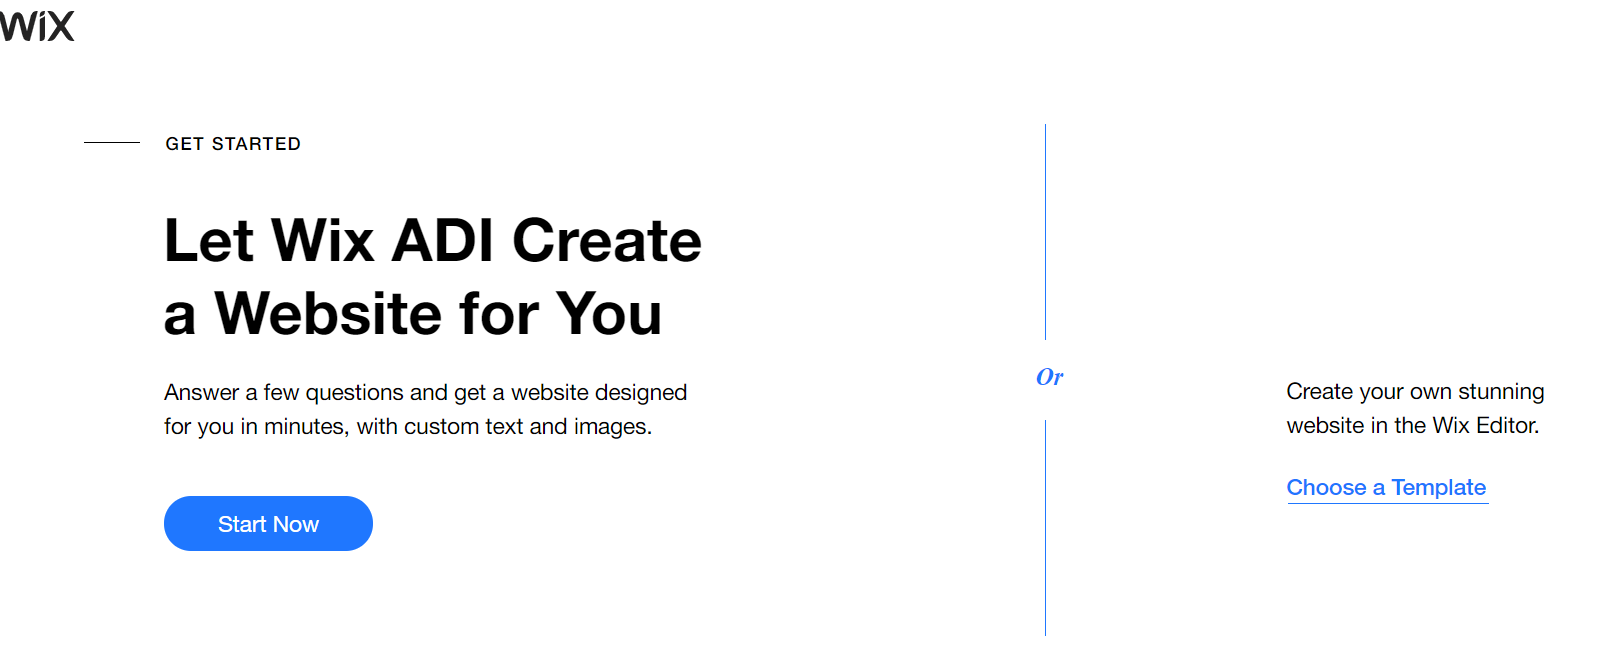
2. Use the Wix ADI (Artificial Design Intelligence) to create your unique website design
Wix will ask you if you want to design your own website from scratch or use their interactive website design tool. If you are new at building websites or don't have website design experience, we suggest using their tool. Get started by clicking the blue "Start Now" button.
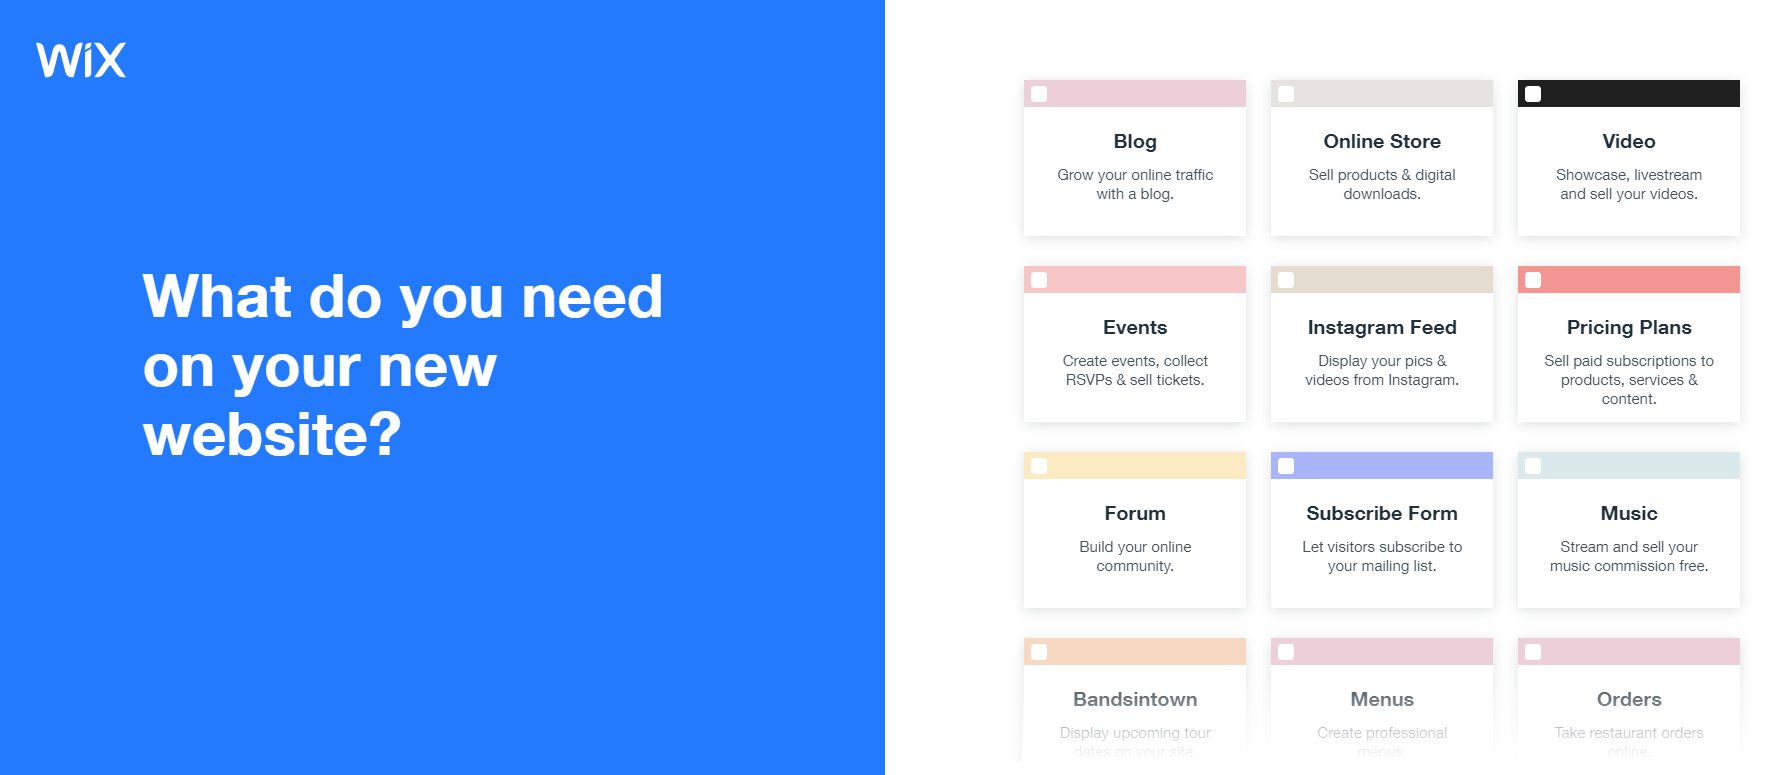
Then, Wix will ask you which features you’ll need for your site. You can explore from several options, but we recommend at a bare minimum selecting "Subscribe Form" and "Blog."
3. Start putting in your mortgage broker information
The first step is providing your name.

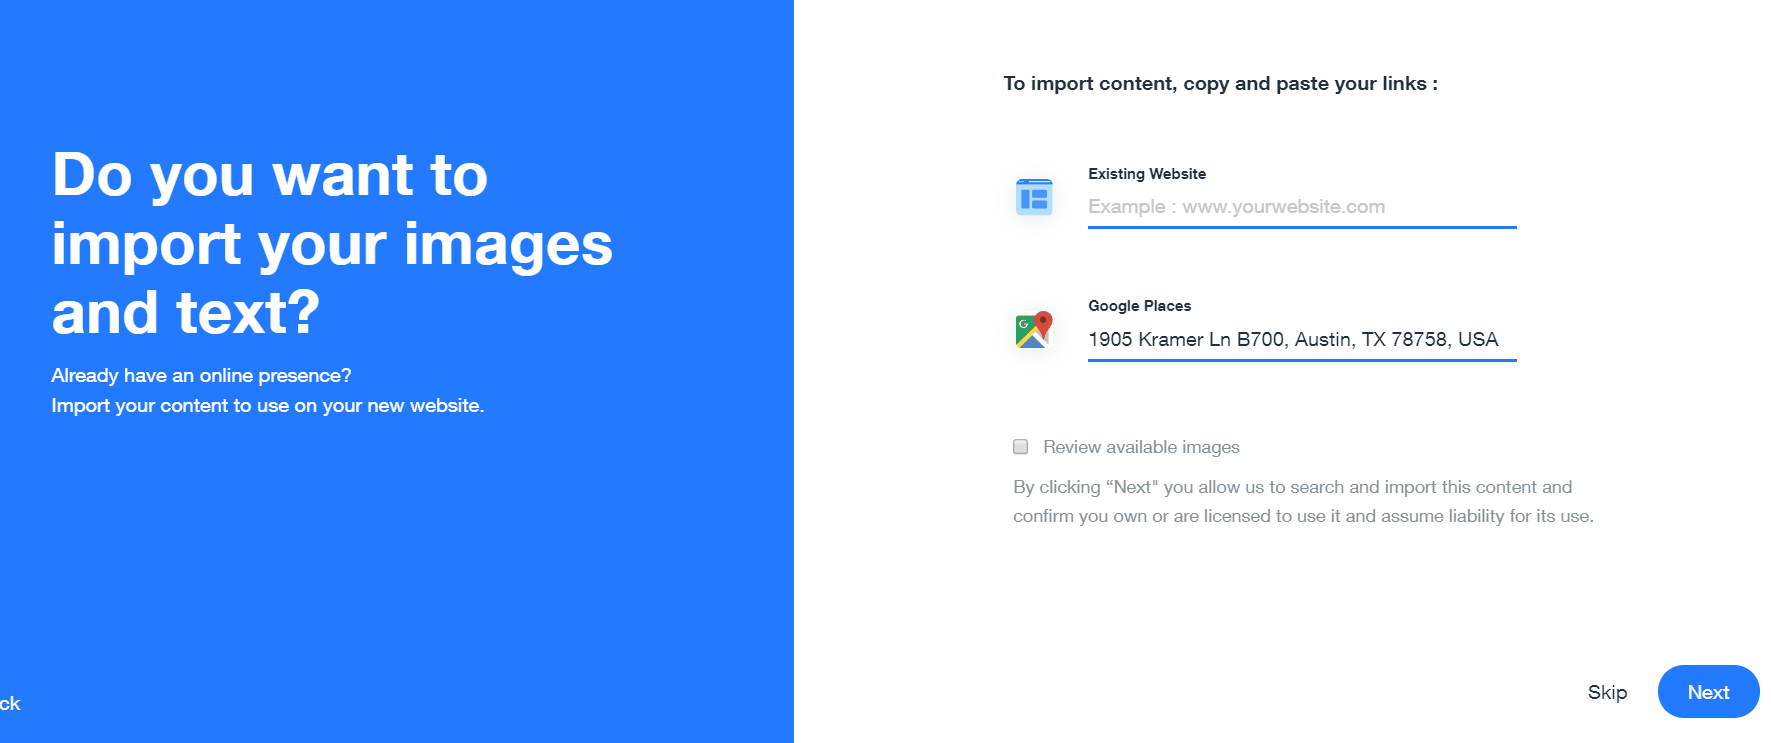
Then you have the option to pull content from an existing website and to find your business on Google. If you have a website with the basic information you need, it might be a good idea to input it. Otherwise, you can always start from scratch. Adding your business information by searching in Google always helps add credibility, but this is also optional. Click "Next" once you have inputted your information or "Skip" to move on to the next step.
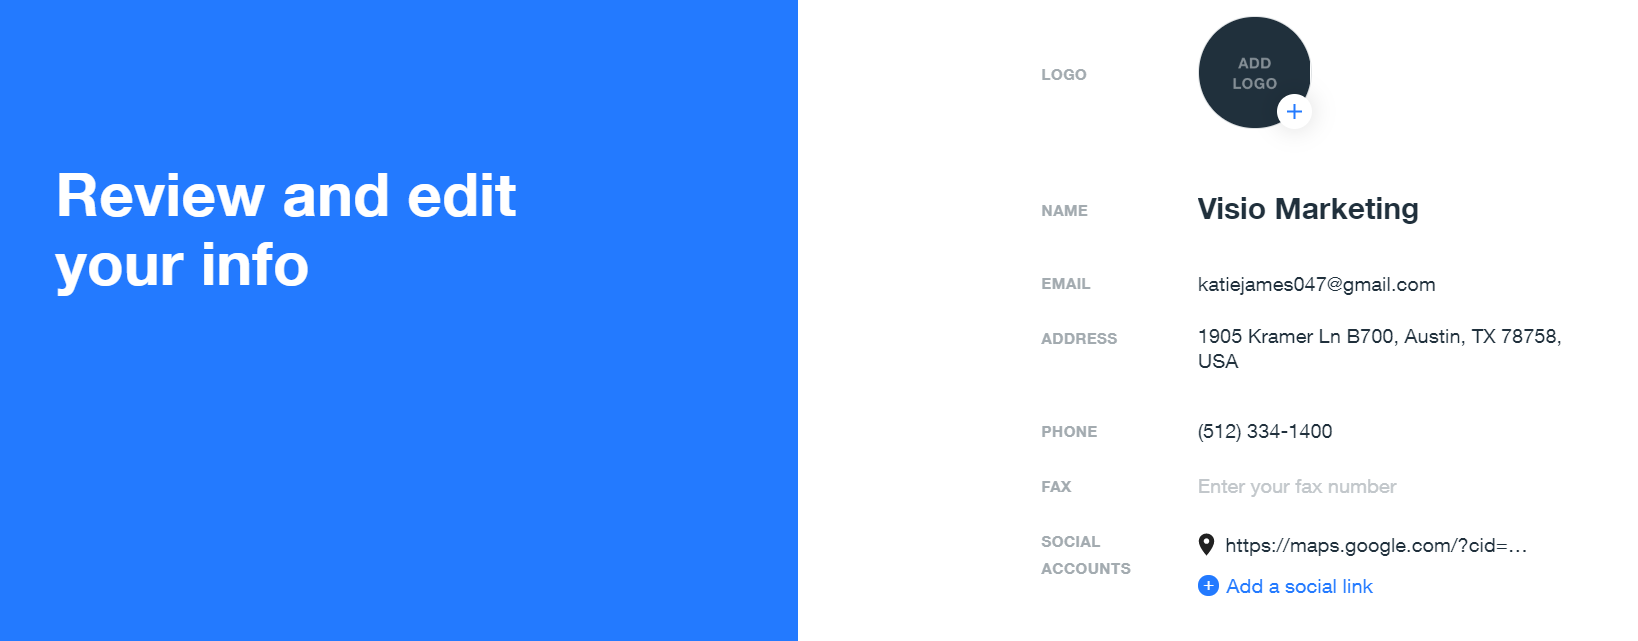
Next, review and edit your business information. You can also upload your logo if you have one, or check out the Wix Logo Maker if you need one.
4. Design your website
Now comes the fun part. Wix will show you six templates with themes. Pick the one that resonates with you and represents your business the most.

Based on your theme and business needs answered previously, Wix will show you three different homepage designs. Select the one you like best.

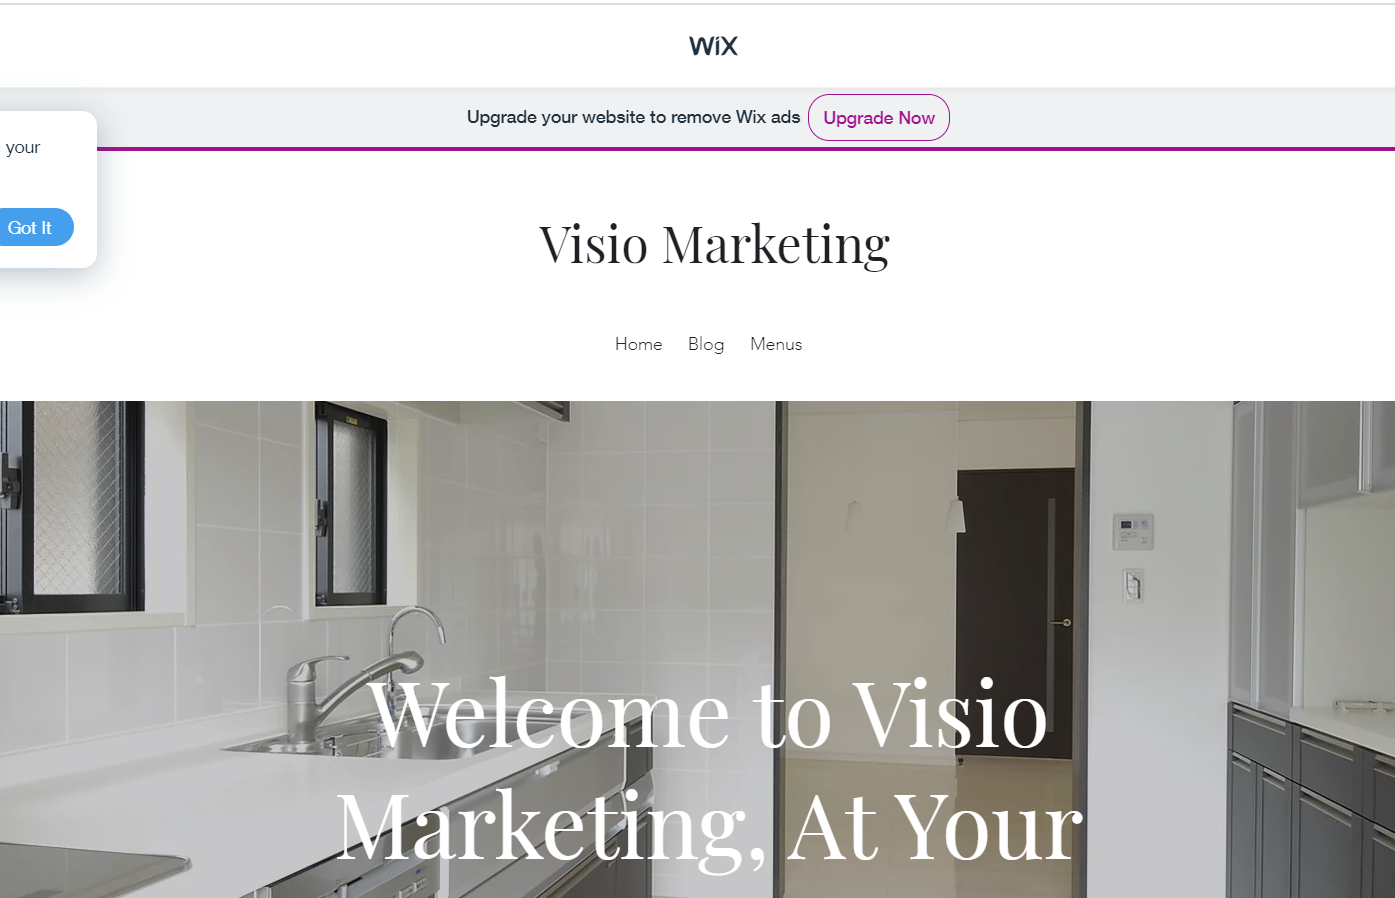
Congratulations! You now have your very first draft of your website.
Your next steps are to publish your site and connect your domain.
Partner with Visio Lending to Grow Your Broker Business
If you’re a broker looking to expand your business, we can help. Visio Brokers closed over $500 million in rental loans in 2021. Our Broker Program Highlights include: